Homemade remedies for cracked heels August 25, 2012 13:30
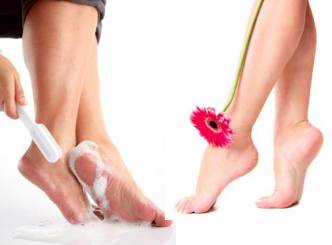
Cracked heels is a problem with everyone; it only 'tends' to worsen in winters and this year, which is supposedly to be the coldest, almost all of us are having cracked heels. Here's an article for all you beauties for having the best heels this season. - One well-known remedy is to soak your feet in a bucket of warm water with lemon juice added to it. After about ten minutes, pat your feet dry with a towel. - A paste of half an avocado with the pulp of ripe banana when applied on dry/ cracked heels makes a lot of difference. Leave this for about ten minutes and then rinse it clean. - Glycerin and rose water is another way to soothe cracked heels. Here are some home remedies to get rid of cracked rough heels Massage your heels with sesame oil before going to bed. This is supposedly the best remedy for cracked heels. Mix glycerin and rosewater together and apply in on the heels daily. This soothes and cures cracked heels real quick. Take 1/4th bucket of water and squeeze one lemon in it, soak your feet in this and wash it with pumice stone and soap. Do this twice a week. Massage your feet with coconut oil every night. With the dawn, scrub and rinse off. cracked heels home remedies Home Remedies for Cracked Heels Make a mixture of lemon juice and papaya; apply it on the cracked heels. Let it be there for 20 minutes at least. Wash off after 20 minutes. Take lukewarm water and soak your feet in it for 15 minutes. This will loosen the dead skin; now wash off with a pumice stone. Mix raw salt (khada namak) in Luke warm water, and scrub your heels sin it as you soak it. Natural Pedicure for your feet, and this will exfoliate your feet too. Use special creams which are meant for treating cracked creams at night, and then scrub off in the morning and wash off, with a pumice stone. (the pumice stone, seems a savior na) Take a super ripe banana, which has almost turned black, and you are about to throw in the dustbin. Mash it, and apply in on the affected areas. Let it be there for 15 minutes at least. Wash off after 15 minutes. This is for a quick healing. Take Paraffin wax, and melt it adding some coconut oil to it. Fill in the crack with this mixture whilst going to bed, wash off in the morning. Mum did for around 2 weeks and the cracked heels are gone. After washing your feet, massage with paraffin oil, Vaseline or hydrogenated vegetable oil. This will keep the feet hydrated. Mix turmeric, tulsi and camphor in equal parts along with aloe vera gel and apply the paste on the heels. Just plain aloe vera gel is great for cracked heels. Mix sodium bicarbonate in luke warm water and soak your feet in it. Wash off with a pumice stone. Helps in exfoliation. Remember, the sugar scrub? Mix sugar with some oil, (olive, coconut, jojoba oil, just any oil) and scrub your feet with it. It is the sweetest cure for cracked heels. icon razz Home Remedies for Cracked Heels Drink a lot of water to keep your skin and boy hydrated. Other Tips to Avoid Cracked Heels Wear the exact size of footwear. No thin soles and backed shoes please. Moisturize your feet and specifically the heels. Keep your feet clean. Scrub and Exfoliate them regularly. Omega 3 and zinc deficiencies cause cracked heels, so make sure you don’t have these deficiencies. Wash your feet every time you come home. Use good creams and products for your feet too. icon smile Home Remedies for Cracked Heels Use powder in your shoes and socks. Walk on green grass. icon smile Home Remedies for Cracked Heels Hope this article helps you. icon smile Home Remedies for Cracked Heels Keep your feet smiling and healthy.!!
Read MoreTop 3 hair-raising myths August 24, 2012 13:01
Here are three myths associated with your hair. Read on... Myth: Plucking a grey hair multiples grey hair growth. Fact: Pure fiction. Thank your stars that this age-old belief is a myth. But still avoid plucking one to prevent damage of roots. Myth: Brushing your hair 100 times every night will increase its shine. Fact: How we wish this wasn't a just a myth. For that perfect lustre, focus on proper hair care or consult your stylist. Too much of brushing might just lead to more hairfall. Myth: Cutting your hair will make it grow faster. Fact: While the myth seems to have been there forever, hair generally grows at its own pace (usually about half an inch per month). But do go in for regular trimmings for a healthy hair by doing away with split ends.
Read MoreSay goodbye to bad hair days August 23, 2012 12:18
Here are a few tips to combat a bad hair day. You ask any girl about her worst nightmare, and she will reply, 'waking up with bad hair'. Every woman faces this predicament at least once in two weeks. Curly hair can go frizzy, straight hair can go limp and wavy hair can go either way. The situation becomes out of control especially during summer when heat and humidity rip the hair off its moisture content, leaving it hard to tame. Chlorine and salt content in the water and bedheads are other factors that worsen the situation. Beauty experts also blame product residual for this state of hair. "After using a variety of products on your hair, it tends to weigh hair down, imparting a different texture to it, and thus making it tough for you to style it," says Lakshmi Nanda, a beauty expert. To keep bad hair day at bay, it is important to cleanse the product residue, at least once a week. "Use a detoxifying hair product that is not high or does not have any alcohol content in it as this can make hair dry," says Seema Kumar, a hairstylist You can also follow these simple steps to tame your mane... - Use shampoos and conditioners according to your hair type (Don't shampoo every day. Wash hair twice a week)- Use a dry shampoo that can absorb oil to clean hair without water. This can add volume to your hair- Trim hair every six to eight weeks- Rub dryer sheet or hand cream to prevent hair from sticking together- Pull back your hair and wear a headband or tie a high ponytail- A scarf or a wig can also temporarily solve the issue
Read MoreDark circles making your Beauty go DARK??? August 22, 2012 17:46
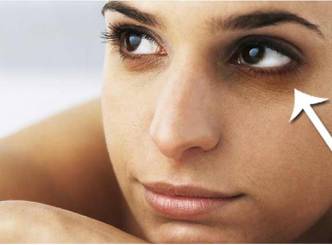
On one day you get up, see your face and observe the changes, you would be shocked to see dark circles around your beautiful eyes. don’t panic, here are the home remedies you can try out getting rid from them; Mix a little almond powder with milk cream and massage the mixture around your eyes before going to bed. This is useful Home Remedy for Dark Circles under Eyes.Slices of cucumber or potato can be used to reduce circles around the eyes. Close your eyes and cover your eyelids with a thin slice for up to twenty minutes. This soothes tired eyes and increases the circulation to the skin around the eyes. One can also apply a little cucumber juice to the area. You could even grate the potato, wrap it in thin cloth and place it over the eyes. Make sure to wash the area thoroughly afterwards and apply a little cream or oil around the eyes to moisturize the area. This is another good Home Remedy for Dark Circles under EyesDetoxing the body helps in certain cases. This involves fasting for short periods of time, but continue to take in plenty of water. Cut out all the unhealthy foods that are a regular part of your diet. Give up alcohol, caffeine, sugary drinks, fatty and sugary food, smoking, etc. Dab a little lemon or tomato juice in to the darkened areas two or three times a day. Be very careful not to let the juice in to your eyes. This is also useful Home Remedy for Dark Circles under Eyes. Soak a couple of tea bags in clean, cold water for a few minutes, squeeze out the excess water and place them over your eyes. Keep them there for ten minutes or so.Buy some Vitamin E supplements in capsule form. Carefully break open the capsule and squeeze the gel on to your finger. Gently and carefully, rub the gel around your eyes. Squeeze the juice from a cucumber and cool it in the refrigerator for an hour or so. Add a little lemon juice and lanolin cream. Apply around the eyes for up to twenty minutes. Wash off carefully. This is useful to get rid of Dark Circles.
Read MoreDoctor's warning: No more bikini waxing! August 22, 2012 11:21
It is claimed to increase the risk of skin infection and sexually transmitted diseases If you're a beach babe and love to don that two-piece bikini, you might have to do without a regime that's a norm with most people...the bikini wax! Doctors are rining alarm bells over the regimen, saying it could be the worst thing to do to the skin. What the claim wasAs a eye opener doctor Emily Gibson, a family physician and director of the health centre at Western University, Washington, recently launched an appeal to end the "war on pubic hair", citing that it is increasing the risk of infection and of sexually transmitted diseases amongst young people. "Pubic hair removal naturally irritates and inflames the hair follicles, leaving microscopic open wounds. Frequent hair removal is necessary to stay smooth, causing regular irritation of the shaved or waxed area. When that is combined with the warm, moist environment of the genitals, it becomes a happy culture media for some of the nastiest bacterial pathogens," she wrote on the US medical website. The announcement can quash one of the most popular trends of wellness and beauty, with salons everywhere offering patrons bikini waxing, laser hair removal we all as 'vajazzling' or doing a decoration of the genitals with jewels. 'IT's very harmful'Apart from the time and money spent on the regime, a bikini wax is alarmingly low on the hygiene factor, say experts. Skin expert Dr Rashmi Shetty talks of how so many youngsters in Mumbai have come to her with skin problems after undergoing such a wax. "What people don't realise is that pubic hair is there for a reason," she starts. "One, it acts as a cushion and protects against injury. In cases where you have to use a washroom in say a cinema or a mall, it can prevent from picking up skin infections as it acts as a shield. The other thing hair in the pubic area is thick so trying to yank it off can lead to pain and bleeding points, which further can cause folliculitis. And using non-sterile wax can cause boils and abscesses, which are very troublesome, so I would say trim the hair from the sides but take care or avoid a bikini wax where they just pull the hair out instantly." She is also against laser hair removal. "The skin is darker in these areas so chances of burns are higher when you do a laser hair removal," she adds. Chance of diseases, tooIf the beautician does not take the proper steps to ensure that her client will not become infected, it is dangerous. Dr Gibson also stated that herpes is also an increased risk, "due to the microscopic wounds being exposed to virus. It follows that there may be vulnerability to spread of other sexually transmitted diseases as well." How it came aboutThe ancient Egyptians used a body-sugaring technique for hair removal. Then, a smooth, hairless body was considered as the standard of beauty. The bikini was introduced in France in 1946, and thus, the 'Brazilian' bikini wax has evolved. Extensive removal of pubic hair is now a common practice.
Read MoreEverything about hair extensions... August 21, 2012 12:50
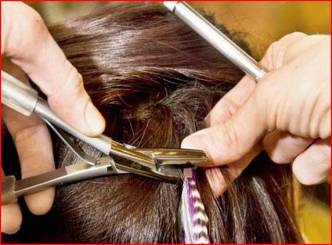
Whether it is incorporating a fringe, a splash of colour or adding length and volume to your hair, extensions can help you attain any style in minutes. We tell you everything you'd want to know about hair extensions. Whether it's a change in colour, style or even the length of their hair, stars like Bella Thorne, Hilary Duff, Selena Gomez, Miley Cyrus, Victoria Beckham and countless others often surprise us with their new looks. How do you think they do it? It's the magic of hair extensions-a great way to instantly create any style. "Whether it's creating soft, romantic waves or poker straight hair, extensions can help transform your hairstlyle in hours or, sometimes, in a matter of minutes," says Aakriti Kochar, beauty and make-up expert. Apart from being one of the key looks this season, long luscious locks have been a dream of many women. However, it takes a long time to grow hair out to a considerable length. Besides, the care and maintenance required are monumental. But hair extensions help you attain the desirable length and texture without much difficulty.So what's the key? It is choosing the type of extensions that are right for your hair and personality and, of course, having them done by a skilled stylist. But before you decide on getting hair extensions, read this guide carefully. What are hair extensions?Also called hair weaves, hair extensions are a form of real or synthetic hair that is closely attached to your scalp, adding length, thickness or colour to your natural hair. Some are long-lasting, some are not; some extensions even last up to a full year before they need to be removed. Well-matched in colour and texture, hair extensions mix with your hair, making it difficult to tell you're wearing them. Good quality human hair extensions are available in salons. You can wash, condition, dry and colour them just like your own hair. They also provide a great deal of styling freedom. Synthetic extensions are made from various types of synthetic fibres and are usually available in beauty and fashion stores. Application techniquesExtensions can be braided in, glued in, woven in, or-if you need a change of look for a special event-clipped in. Real or fake, celebs love extensions Bollywood's barbie doll Katrina Kaif sported red wavy extensions in New York to portray a cheerful college student who likes to dress young and radical. Model and socialite Kim Kardashian made her long raven extensions a trademark of her look. She had them removed, but recently went back to "fake hair" despite boyfriend Kayne West wanting her to get rid of it. She tweeted a snap of her new look with the caption: "Long locks, I really missed you..." Things to keep in your mind Why opt for it?If you struggle to grow your natural hair, hair extensions can not only give added length to your hair, but also extra volume.You can try new hairstyles without getting fixed to one. In case you get bored with long hair, remove the extensions and get a new look.Hair extensions are the best solution to cover up a bad haircut. "You can get subtle highlights without using a chemical process such as bleaching or colouring," says Harsh Nepali, technical educator-hair. You also put on different beads and create a new style of your own. Hair extensions are pain-free. Cons to watch out for"Hair extensions can cause some damage to your real hair," says Placid Braganza, a design artiste. "Since they are attached using thermal heat, knotting, braiding or gluing, they can hamper hair roots or even break, split or burn hair strands if not done carefully," he adds. AftercareUse a special brush available in beauty stores to ensure your extensions are not destroyed. Before going to bed, braid your hair into one large loose braid at the back of the neck. After waking up, undo the braid and comb through, beginning at the ends, working your way up to your roots.Use a gentle shampoo and rinse under cold water to avoid tangles. "Preferably, go for a shampoo with a pH value no higher than pH7," suggests Kochar. Dilute it in some warm water and sponge it into the hair. Do not massage. Rinse thoroughly and apply conditioner and comb your hair, starting with the ends. Let the extensions air-dry.Avoid excessive usage of styling aids, such as mousse, gel, and hairspray. If possible, opt for alcohol-free products. Quick clip-ons Clip-on hair extensions come in a wide variety of colours, lengths, and styles. You can opt for a human or synthetic clip-on extension Plus points: Clip-on hair extensions give you a change of look without damaging your natural hair. "They are easy and quick to apply; usually taking five to seven minutes," says beauty expert, Sylvia Chen. "Moreover, in case you're not very comfortable, you can immediately pull them out," she adds. Red flags: These clip-on hair extensions need to be removed before you go to bed. You cannot sleep or swim with these. So you may not want to opt for them if you're planning to wear them on a daily basis; you'd have to follow the routine of attaching them every morning and removing them before sleeping. Moreover, they may also lead to hair breakage while removing the clips; some even tend to tangle and fall apart after a few days. Linking: Longer-lasting extensions are added to natural hair with metal rings or keratin tubing. In this process, the hair is attached to a small ring or tube, which is clamped onto pieces of real hair. Plus points: Causes minimal damage to your natural hair as no adhesives or solvents are used. Red flags: They can be difficult to remove. Also, adding any kind of additional weight to the hair can loosen the strands after a few washes. Bonding: Bonding or gluing is a temporary weaving method and usually involves longer hair wefts. Plus points: This method is quick to do. Red flags: Hair extensions attached by this method do not last too long. Fusing: Hot fusion involves braiding extensions into natural hair and bonding them together with a wax adhesive. Recently, cold-fusion extensions made of 100% human hair have also been introduced. Plus points: With a fusion weave, you can wash your hair every week and use products like gels and mousse to style. Red flags: This is one of the most time-consuming and expensive methods. Weaving: Your natural hair is braided tight and close to the scalp in cornrows, and the weft is then sewn into the braid. Plus points: You can care for this style as you would for your natural hair. It doesn't involve a lot of maintenance cost. Red flags: The process takes a long time, as your hair strands are braided first. It is expensive, but may last longer.
Read MoreSelf-made perfect Eye brows... August 20, 2012 16:18
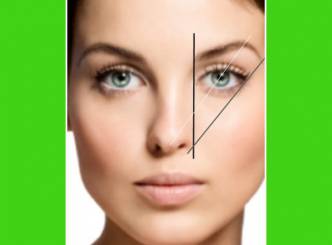
Plucking your eyebrows to achieve that perfect, face-framing arch can be a tedious (and painful!) process. But since fuller, thicker brows are in style, you can (and should) spend much less time with the tweezers. Try these 10 pro beauty tips to score A-list arches at home. Eyebrow Shaping Tip #1: Choose the Right Tweezers"Opt for a sharp, slanted style. "Unlike pointy versions, they grab tiny strays quickly and won't pinch your skin along with the hairs." Eyebrow Shaping Tip #2: Tweeze After Your ShowerWarm water opens the follicles and softens hairs, helping them slip out more easily. Eyebrow Shaping Tip #3: Ease the Plucking PainIf plucking is too painful or it's right before your period (when skin is most sensitive), dab on a numbing gel like Orajel-Baby Teething Pain Medicine before you tweeze. Eyebrow Shaping Tip #4: Ditch your Magnifying Mirror This tool can make it look like there's more hair to remove than there really is, which can lead to over plucking. Instead, use a regular mirror in a well-lit room-if you can't see stray hairs under these conditions, neither can anyone else. After every few tweezes, take a couple of steps back to see the bigger picture. Eyebrow Shaping Tip #5: Know your Arch Limits Hold a pencil for guidance, "Your brows should begin directly above your tear duct, peak in line with the outer side of your iris, and end at a point that falls 45 degrees from the outer corner of your eye." Be sure not to arch your brows too high or they'll look unnatural. Eyebrow Shaping Tip #6: Create Your ShapeOnce you've determined how your brows should curve, outline your ideal arch using a soft, creamy brow pencil. Then remove only the hairs that fall above or below your self-made stencil. Eyebrow Shaping Tip #8: Brush Up Style your arches with a brow brush or a clear, brow-gel wand, coaxing hairs upward at the start of your arch and brushing the rest toward the end of your eye. Eyebrow Shaping Tip #10: Grow Them InOverplucked? Refrain from tweezing for at least three weeks so you can see the natural growth pattern and shape. If your brows need a little extra encouragement, brush on a growth serum like RevitaBrow Eyebrow Conditioner BONUS Eyebrow Shaping Tip: Get the TintWhile pencils and powders are great for enhancing your arches day to day, consider brow tinting for a more permanent solution. It saves time in the morning, since you don't have to worry about adding definition with the right pencil or powder daily. You can just wake up and go." But don't try this at home! The safe way to color your arches, is with the help of a pro brow guru or colorist, who will likely use a semi-permanent vegetable dye.
Read MoreHere comes the botox bride August 20, 2012 09:29
Busy with establishing their careers, an increasing number of women are choosing to get married in their 30s and even 40s. Looking good is a must and it is a botox jab that guarantees glowing skin on D-Day for many of these women. Skin experts say botox brides are definitely the trend. According to a survey conducted by a leading matrimonial site, 65 per cent of girls in the city are not in a hurry to get married. Of them, almost half, about 45 per cent, go for botox treatment, say industry insiders. "Everyone is conscious about their skin and appearance and it leads to a huge demand for bridal botox treatments. Women plan their wedding and cosmetic treatments well in advance with the help of experts. They do a botox trial run about three-four months ahead of the wedding day," Delhi-based cosmetic dermatologist Vandana Chatrath told us. Usually, brides-to-be opt for botox treatment to get rid of frown lines, crow's feet, eyebrow shaping, face contouring and the most embarrassing problem - excessive underarm sweating. Said Rashmi Shetty, a cosmetic physician based in Mumbai: "The most popular botox treatment among brides is treatment for hyperhidrosis (controlling excessive sweating). No bride wants to don a sweaty patch under her armpit especially on her wedding day and in her wedding pictures." The second most popular treatment, she said, is brow lift as it "leaves you with desirable arch and gives you a lively and happy look". Another sought after treatment is for open pores. Explaining the procedure, Shetty told us: "Brides are made to sit under spotlight for hours on their wedding day and their wider pores make their skin look sticky and tired. To deal with the problem, a micro-injection is given to tighten the skin and the result is a glowing firm look." It costs a packet, but for these new breed of multi-tasking women who are financially sound, it doesn't really matter. Cost depends on the units of botox used for various treatments. The price range starts from Rs.5,000 and goes up to Rs.40,000. So, yes, brides definitely have a variety of alternative treatments to choose from. K.M. Kapoor, a plastic surgeon in Chandigarh, said one of the biggest advantages of such a treatment is the zero down time. "These treatments can be done just two weeks before to get the desired results. Compared to conventional beauty treatments offered by salons, the result of botox treatment lasts for five-six months," Kapoor told us. Shilpa Shetty, Aishwarya Rai and Manisha Koirala are some of the Bollywood actresses who preferred late marriage, but looked their best on their wedding day. Others too want to sport the same glow and radiance. However, extra care is advised. "Before treatment, please do your homework well. Please be sure about the doctor you are getting treated by. Be sure you are not in the wrong hands or your special day could become a nightmare for you. Research well about your doctor, and be sure that he or she is well trusted and qualified," said Shetty. Most important, the girls must check that the medicine that is being used for the treatment is FDA ( Food and Drug Administration)-approved. "A lot of fake medicines are being made in the name of botox treatment, a lot of Chinese material is also in market," added Chatrath. Also, a personalised diet-plan and a specific skin-care regime suggested by qualified doctors needs to be followed in order to maintain the effect.
Read MoreSelection Tips of Kurtis for Women August 18, 2012 15:52
More than 10 years from now, in the fashion industry, particularly for urban middle or above middle class Woman/Girls, 'Kurtis' are all time favorites. Be it as a daily use or a party ware or for an outing, Kurtis' are must. Just that the colors and the designs we wear them as per the occasions... you can team them up with that pencil cut Jeans, leggings, semi Patiala's or Patiala’s , chudidaars or what not... it still remember opting for wearing shalwars as a daily use, rather than 'Kurtis'... but, could not stick to the decision for more than a month. So, back to kurtis again... if you are also planning for shopping for new set of kurtis, then here are some designs of the latest Kurtis. Choose what is suitable to you amongst these and go ahead for some more set of kurtis for you; Now let us know what type of Kurtis is best suited for different occasions; Sleeveless Kurtas for Women: Best suited for summers. The light weight and soft sleeveless kurtis are the most sought after clothing during hot weather. It is available with or without collars. The collared kurtis are designed with fine threads of gold, silk, cotton or other materials. Summer kurtis have chikan embroidery around the edges and upper front. As mostly used in summers the fabric must soak sweat, should be soft to skin and allow air to pass through. Kurtis are available in array of colors, patterns, shades. These can be plain, printed or embroidered. The quality and design vary from simple one to designer's creation. Half Sleeves Kurtas for Women: Absolutely perfect for offices, parties, marketing, travel. Available in innumerable designs and shades. Plain and check kurtis are much sought items. Designs of flowers, leaves, print, checks etc. injects a energetic approach to your attitude. Full Sleeves Kurtas for Women: This type of garment each lady would like to have it in her wardrobe. They can be worn by females of all age groups starting from kids, teenagers to working women. It gives a unique look to you. Innumerable designs and styles are available for full sleeved kurtis. Kurtis heavily embroidered around collars, upper front and wrist are best suited for wedding ceremonies or parties. These Kurtis are used in all seasons. Fabric used in ladies kurtis should be of good quality Stitching of these kurtis should be checked properly Kurtas for women must have a fine finishing Latest fashion trend followed while creating the ladies kurti designs Good quality color should have been used so that they do not fade in long use The kurtas shouldn't shrink after wash So, keeping all these in mind, shop for your kind of a 'Kurtis'...
Read MoreA 'beautiful' You this monsoon... August 17, 2012 13:27
While the monsoons bring a welcome respite from summer heat, they also pose a lot of challenges to healthy skin. The heat-induced rashes of summertime give way to the humidity-induced problems of the rainy season. If you are health-conscious and take a few simple precautions, you can save yourself a lot of misery over bad skin. The biggest skin complaint during the monsoon has to be fungal infections. A fungus thrives in humidity -- wet skin folds rubbing against each other get macerated easily, providing easy entry to fungi and yeast. As a result, you develop itchy, circular, reddish, flaking patches on the body, especially in skin folds at the groin (Jock Itch), underarms and around the breast in women. Fungal infections can also affect your feet, especially if you wear closed shoes all day. Staying dry is the best way to avoid them. Carry a set of dry clothes and footwear to the office and change immediately if you've gotten drenched on your way. Once you are seated at your desk, take your shoes and socks off to allow air circulation around your feet. Wear sandals or floaters as far as possible. Use plenty of dusting talc to prevent accumulation of sweat and moisture in skin folds. Those prone to repeated fungal infections can use medicated powders like Absorb, Mycoderm etc. Scabies is another common infection that preys on both children and adults during the monsoon -- it is caused by a mite infestation. If your child complains about a body itch that intensifies at night and you see a few red bumps or a rash on his/her hands, wrists, underarms, abdomen, groin and buttocks, then rush to the dermatologist -- this condition is highly contagious and invariably spreads to the family if not treated properly. Sickly, dull, oily-looking skin is common during the rainy season. Nondescript itching also occurs occasionally. A few additional tips on how to keep your complexion glowing: Use a face scrub twice a week to exfoliate. Avoid heavy moisturising creams or oily foundations and cream-based colour makeup. Use a light mousse or a matte compact or simply a few drops of calamine lotion as a makeup base. A facewash containing alpha hydroxyl acid (like Ahaglow) helps to freshen the skin, but do not use it more than once a day. Use a toner each time you wash your face to close the pores and restore your skin's pH balance.
Read MoreTry these funky nail art ideas August 17, 2012 10:54
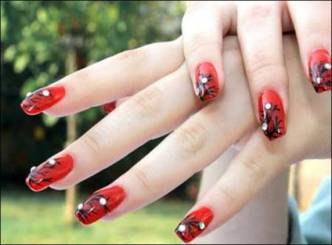
There's more to nail art than just neon varnish and French manis. Glam up those talons with these fun ideas sourced by Bushra S Khan. Here's a how-to from nail art technician Aditi Mehta The moon manicure This look can be a chic and funky look for a dull day You'll need: -Two nail polishes. We chose black and coral, as coral has been a hot favourite shade. -Nail guiding strips (easily available at most beauty outlets) Procedure: 1. Put on two coats of the coral polish. 2. Stick the nail guiding strip as close to the base of your nail as possible. 3. Make sure to lock the strips at both ends. How do you that? Press the strip into the crevice at the side of your nail (between your nail and flesh. You should do that so that the black nail paint does not seep into the coral colour). 4. Apply two coats of the black nail paint. 5. Peel off the strip only when you are absolutely sure that the polish has dried off completely. And be extremely careful while you are at it. 6. Seal it with a top coat. 7. Flaunt your half-moon manicured nails! Tip: 1. If you are using a light and dark varnish, remember to keep the lighter colour for the moons while using the darker colour for the rest of the nail bed. Note: There is a risk of the darker colour bleeding onto the lighter shade and you might have to start all over again. 2. If you have a shorter nail bed, don't make your moons too big. You nails will appear smaller than they are. Tips and bows A classy look that borders on cute and you can easily wear to work without looking boring You'll need: -Pink nail varnish -No. 0 nail art brush -Base coat Procedure: 1. Paint just the tips of your nails with the hot pink nail varnish. You can use nail strips (sold in almost all beauty outlets and often used for French manicures) as a guide. 2. Using black poster colour and your No. 0 nail art brush, draw two triangles where your pink tips start. Fill the triangle with black colour and also draw the strands/ ends/ frills of the bows. 3. Finish with a top coat. Tip: 1. Try to keep your triangles as tiny as possible and gradually build up on the size if you want bigger bows. 2. Amp up the look by drawing a neat line in black using your No. 0 brush between the pink tips and the nail bed and use the same brush and draw tiny polka dots with white nail varnish. Nail artist Aditi Mehta says most nail art is done with poster colours. Why? Well for starters, if you mess up the bow, you will have to wipe off everything with a nail varnish remover; paint the tips with two coats of nail polish, carefully draw the bows all over again, recoat and also wait for four coats of polish to dry. Whew! That's a lot of waiting. On the other hand, if you mess up while using poster colours, all you have to do is dip a cotton ball in water, wipe off the messed-up bows gently, and draw them more carefully. Easy peasy!
Read MoreWinter Lip Care August 16, 2012 11:13
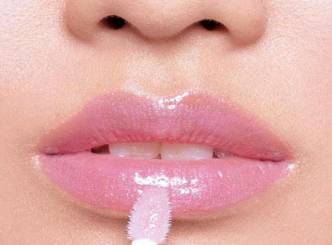
Usually lips suffer most during the winter season. Soft and smooth lips figure among the foremost indicators of physical beauty. There are many problems that can be created for lips in the winter season.The skin on lips lack oil glands; hence they tend to get dry and cracked easily. Lip Care In Winter Usually lips suffer most during the winter season. Soft and smooth lips figure among the foremost indicators of physical beauty.There are many problems that can be created for lips in the winter season.The skin on lips lack oil glands; hence they tend to get dry and cracked easily.Here are some tips for Lip care in winter:- 1.By applying a juicy paste made out ripe papaya, you can soften your chapped lips. Papaya contains certain exfoliating enzymes which add suppleness to lips. 2.Once a week apply scrub on your lips. The one you apply on your face will suit perfectly. Here is the exemplary recipe for peeling: mix 2 teaspoons of semolina with a half-spoon of honey and massage lips gently with mixture. 3.In winter it would be good to decline using decorative lipstick, especially the permanent means. Some of lipstick components occlude the skin pores. If you still put decorative lipstick on, then do not forget to put nourish balsam on before lipstick. This will prevent your lips from dryness and exfoliation. 4.Warm sesame oil will also smooth your lips. Avoid licking your lips and don’t bite the skin on the surface of your lips. 5.Drink more water is not only for summers. You need an average amount of water in body in winters as well. So, to hydrate your skin in winters you need to drink enough amount of water. This will keep your lips better and your body as well. 6.Dip a black tea bag in warm water and press it on lips for three to four minutes. This increases moisture level on skin of lips. 7.Use of lip balms with an SPF factor is advised because it not only moisturizes the lips but also protects them from harmful sun rays as well. 8.Choose a natural lip balm and apply it every time before going outside as well as before going to bed.
Read More